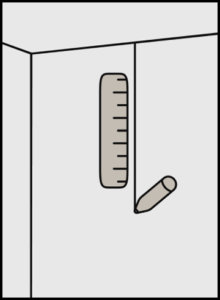
Tools You’ll Need
soft cloth
level
plastic smoother
tape measure
utility knife
pencil
Preparation Stage
Application
Leave the wallpaper in the room for 24 hours to allow it to adapt to the temperature and humidity. While waiting, prepare the wall and gather the necessary tools — the list is provided below.
Before applying the wallpaper, be sure to remove any previous wall coverings. Priming is not necessary, but it is recommended to level the surface with filler. Avoid applying wallpaper to damp filler or fresh paint — follow the drying time recommended by the manufacturer.
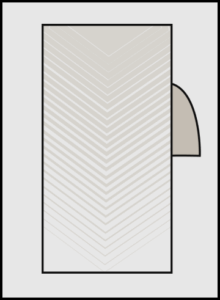
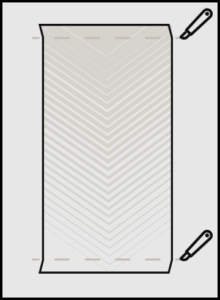
The wallpaper is delivered in a single roll, which must be cut into individual strips along specially marked horizontal cutting lines. Use scissors — cut carefully and precisely along the line.
At the top and bottom of each strip, there are technical marks: top, bottom, and the sequence number. Do not cut these off in advance — they are necessary for correctly placing the strips on the wall. After installation, they should be trimmed using a knife and level.
The last strip in the roll is usually narrower than the others. It should be cut lengthwise along the roll, leaving a small margin on the right — this will make it easier to align with the previous strip.
Check all the strips by laying them out on the floor and making sure the image forms a continuous design without defects.
Please note: complaints after the wallpaper has been applied will not be accepted.
It’s very important to apply the first panel correctly, as it sets the alignment for all subsequent panels. Don’t rush.
Measure the width of the first panel starting from the left side of the wall.
Use a pencil and level to draw a vertical line — this will be your guide.
Each strip has a margin at the top and bottom, marked with the strip number, top, and bottom indicators.
Follow these labels to ensure correct placement. Do not cut them off in advance — this should be done after the panel is applied to the wall.
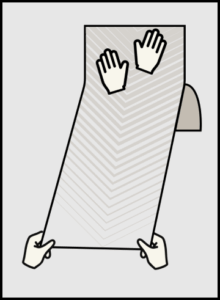
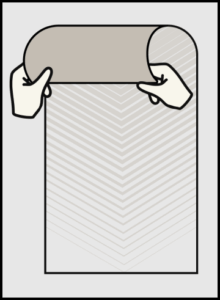
Take panel no. 1 and peel off about 30–60 cm of the protective backing.
Place the top of the panel against the wall near the ceiling.
Align the right edge with the guide line and press lightly.
If necessary, you can carefully peel back the panel and adjust it.
When applying self-adhesive wallpaper, it is strictly forbidden to stretch the material either horizontally or vertically.
This may cause the image to become distorted, as the material tends to shrink back to its original size after installation.
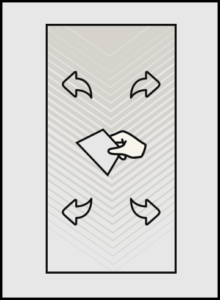
We recommend applying the wallpaper without any tension, carefully smoothing it out from the center toward the edges.
Gradually peel off the backing and press the wallpaper onto the wall a few centimeters at a time.
Avoid pulling too hard — this may stretch the material and misalign the pattern.
It’s best to work in pairs: one person guides the top and along the seam, while the other holds the opposite side away from the wall.
Using a plastic smoother, flatten the wallpaper to remove any wrinkles and air bubbles.
Work from the center outward. Press firmly and evenly to ensure good adhesion.
After the panel is applied, trim any excess at the top and bottom using a utility knife and level.
Then firmly press down the top and bottom edges with the smoother.
Repeat the previous steps for each subsequent panel.
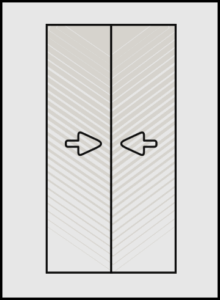
Align the left edge of the new panel with the right edge of the previous one.
Carefully match the pattern and smooth the surface.
At the end, trim the excess white edge on the last tile.
We use cookies to give you the best online experience. By agreeing you accept the use of cookies in accordance with our cookie policy.
When you visit any web site, it may store or retrieve information on your browser, mostly in the form of cookies. Control your personal Cookie Services here.
Analytical cookie options allow insight into information, which provides insights that can be applied to viewer interaction. Cookies may provide you with information or metrics related to paying for services, sending messages, sending documents, etc.